
Installer GitLab sur Debian
Prérequis :
sudo apt update
sudo apt install ca-certificates curl openssh-server postfix apache2 dovecot-common dovecot-imapd dovecot-pop3d
sudo a2enmod proxy;
sudo a2enmod rewrite;
sudo a2enmod proxy_http;
Ajout du dépôt pour installer GitLab :
cd /tmp
wget https://packages.gitlab.com/install/repositories/gitlab/gitlab-ce/script.deb.sh
bash script.deb.sh
Installation de GitLab :
apt install gitlab-ceModification de la configuration de GitLab :
nano /etc/gitlab/gitlab.rb# Modifier l'url selons vos besoins
external_url "https://gitlab.nehemiebarkia.fr"
# Disable nginx
nginx['enable'] = false
# Give apache user privileges to listen to gitLab
web_server['external_users'] = ['www-data']
#Configure push and pull on server repositories
gitlab_workhorse['enable'] = true
gitlab_workhorse['listen_network'] = "tcp"
gitlab_workhorse['listen_addr'] = "localhost:8181"Autorisation d'accès à gitlab_workhorse :
# Création du fichier de configuration
nano /etc/default/gitlab
gitlab_workhorse_options="-listenUmask 0 -listenNetwork tcp -listenAddr 127.0.0.1:8181 -authBackend http://127.0.0.1:8080"
Configuration d'apache :
nano /etc/apache2/sites-available/gitlab.conf# This configuration has been tested on GitLab 13.8
# Note this config assumes unicorn/puma is listening on default port 8080 and
# gitlab-workhorse is listening on port 8181.
# To make puma listen on port 8080 edit gitlab/config/puma.rb and add the following:
# Configuration moddifiée par Barkia Néhémie
#
# bind 'tcp://127.0.0.1:8080'
#
# To allow gitlab-workhorse to listen on port 8181, edit or create
# /etc/default/gitlab and change or add the following:
#
# gitlab_workhorse_options="-listenUmask 0 -listenNetwork tcp -listenAddr 127.0.0.1:8181 -authBackend http://127.0.0.1:8080"
#
#Module dependencies
# mod_rewrite
# mod_ssl
# mod_proxy
# mod_proxy_http
# mod_headers
# This section is only needed if you want to redirect http traffic to https.
# You can live without it but clients will have to type in https:// to reach gitlab.
<VirtualHost *:80>
ServerName gitlab.nehemiebarkia.fr
ServerSignature Off
RewriteEngine on
RewriteCond %{HTTPS} !=on
RewriteRule .* https://%{SERVER_NAME}%{REQUEST_URI} [NE,R,L]
</VirtualHost>
<VirtualHost *:443>
Include /etc/letsencrypt/options-ssl-apache.conf
SSLCertificateFile /etc/letsencrypt/live/gitlab.nehemiebarkia.fr-0001/fullchain.pem
SSLCertificateKeyFile /etc/letsencrypt/live/gitlab.nehemiebarkia.fr-0001/privkey.pem
ServerName gitlab.nehemiebarkia.fr
ServerSignature Off
ProxyPreserveHost On
# Ensure that encoded slashes are not decoded but left in their encoded state.
# http://doc.gitlab.com/ce/api/projects.html#get-single-project
AllowEncodedSlashes NoDecode
<Location />
# New authorization commands for apache 2.4 and up
# http://httpd.apache.org/docs/2.4/upgrading.html#access
Require all granted
#Allow forwarding to gitlab-workhorse
ProxyPassReverse http://127.0.0.1:8181
ProxyPassReverse http://gitlab.nehemiebarkia.fr/
</Location>
# Apache equivalent of nginx try files
# http://serverfault.com/questions/290784/what-is-apaches-equivalent-of-nginxs-try-files
# http://stackoverflow.com/questions/10954516/apache2-proxypass-for-rails-app-gitlab
RewriteEngine on
#Forward all requests to gitlab-workhorse except existing files like error documents
RewriteCond %{DOCUMENT_ROOT}/%{REQUEST_FILENAME} !-f [OR]
RewriteCond %{REQUEST_URI} ^/uploads/.*
RewriteRule .* http://127.0.0.1:8181%{REQUEST_URI} [P,QSA,NE]
RequestHeader set X_FORWARDED_PROTO 'https'
RequestHeader set X-Forwarded-Ssl on
# needed for downloading attachments
DocumentRoot /opt/gitlab/embedded/service/gitlab-rails/public
#Set up apache error documents, if back end goes down (i.e. 503 error) then a maintenance/deploy page is thrown up.
ErrorDocument 404 /404.html
ErrorDocument 422 /422.html
ErrorDocument 500 /500.html
ErrorDocument 502 /502.html
ErrorDocument 503 /503.html
# It is assumed that the log directory is in /var/log/httpd.
# For Debian distributions you might want to change this to
# /var/log/apache2.
LogFormat "%{X-Forwarded-For}i %l %u %t \"%r\" %>s %b" common_forwarded
ErrorLog /var/log/httpd/logs/gitlab.nehemiebarkia.fr_error.log
CustomLog /var/log/httpd/logs/gitlab.nehemiebarkia.fr_forwarded.log common_forwarded
CustomLog /var/log/httpd/logs/gitlab.nehemiebarkia.fr_access.log combined env=!dontlog
CustomLog /var/log/httpd/logs/gitlab.nehemiebarkia.fr.log combined
</VirtualHost>
<Directory /opt/gitlab/embedded/service/gitlab-rails/public>
# required for icons
Options FollowSymLinks
Require ip 127.0.0.1
</Directory>
Vous devez disposer d'un certificat SSL
Création du dossier de logs :
mkdir /var/log/httpd/logs/ -pNous avons terminé de configurer GitLab ! il ne reste plus qu'à les appliquer :
# Attention, cette commande est longue ! (Allez prendre un café !)
#
#
gitlab-ctl reconfigure
Puis, nous activons notre configuration apache :
a2ensite gitlab
systemctl reload apache2
Nous allons désactiver l'indexation de notre GitLab (optionnel) :
nano /opt/gitlab/embedded/service/gitlab-rails/public/robots.txtNous allons décommenter les deux lignes suivantes :
 User-Agent: *
 Disallow: /
Décommenter signifie retirer le # au début de la ligne
Nous pouvons maintenant nous rendre sur https://gitlab.nehemiebarkia.fr :
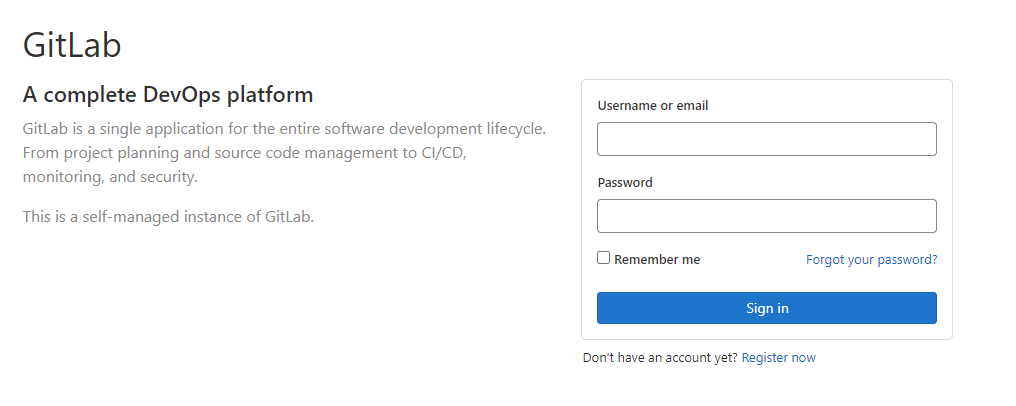
Modification du mot de passe du compte administrateur de gitlab :
# Cette commande va nous permettre d'accèder à la console de gitlab
#
# Attention, c'est une commande assez longue. Patienter pour avoir accès à la console.
gitlab-rails console -e production
# Nous changons le mot de passe du compte surperadmin (root) et mettons : secret-pass
#
#
user = User.find_by_username 'root'
user.password = 'secret-pass'
user.password_confirmation = 'secret-pass'
user.send_only_admin_changed_your_password_notification!
user.save!
user.skip_reconfirmation!
Vous pouvez maintenant vous connecter sur votre GitLab !
Installation des exécuteurs Docker :
Dans un premier temps, nous allons déterminer quel est notre architecture linux :
uname -mGrâce à cette commande je sais que mon architecture est en x86_64.
Téléchargement du fichier binaire :
# Linux x86-64
sudo curl -L --output /usr/local/bin/gitlab-runner "https://gitlab-runner-downloads.s3.amazonaws.com/latest/binaries/gitlab-runner-linux-amd64"

# Linux x86
sudo curl -L --output /usr/local/bin/gitlab-runner "https://gitlab-runner-downloads.s3.amazonaws.com/latest/binaries/gitlab-runner-linux-386"

# Linux arm
sudo curl -L --output /usr/local/bin/gitlab-runner "https://gitlab-runner-downloads.s3.amazonaws.com/latest/binaries/gitlab-runner-linux-arm"

# Linux arm64
sudo curl -L --output /usr/local/bin/gitlab-runner "https://gitlab-runner-downloads.s3.amazonaws.com/latest/binaries/gitlab-runner-linux-arm64"

# Linux s390x
sudo curl -L --output /usr/local/bin/gitlab-runner "https://gitlab-runner-downloads.s3.amazonaws.com/latest/binaries/gitlab-runner-linux-s390x"
Choisissez la commande liée à VOTRE architechture !
On rend le binaire exécutable :
sudo chmod +x /usr/local/bin/gitlab-runner
Ajout du compte linux pour CI :
sudo useradd --comment 'GitLab Runner' --create-home gitlab-runner --shell /bin/bash
Installer et exécuter en tant que service :
sudo gitlab-runner install --user=gitlab-runner --working-directory=/home/gitlab-runner
sudo gitlab-runner start
Déclaration des exécuteurs :
sudo gitlab-runner registerCette commande, va vous poser plusieurs questions. Voici mes réponses :
Enter the GitLab instance URL (for example, https://gitlab.com/):
https://gitlab.nehemiebarkia.fr
Enter the registration token :
XXXXXXXXX // Je ne vais pas vous donner mon token mais vous trouverez le votre dans les paramètres gitlab (/settings/ci_cd)
Enter an executor: docker+machine, kubernetes, custom, docker-ssh, parallels, virtualbox, docker-ssh+machine, docker, shell, ssh :
docker
Enter the default Docker image (for example, ruby:2.6) :
php:latest
Le runner est désormais disponible :

Il ne faut surtout pas oublier d'installer docker : https://docs.nehemiebarkia.fr/books/installations/page/installer-docker
Configuration de postfix
Ajout d'un certificat SSL à Postfix :
sudo dpkg-reconfigure postfixOn choisi "Internet Site ; Puis on précise notre FQDN, dans mon cas "nehemiebarkia.fr". En-suite on entre "root". Puis on laisse les données pré-entrées. En suite on répond non à "Force syncronus update on mail queue ?". Et enfin, nous laissons les choix pré-entrés pour toute les autes questions.
Configuration des mailboxs :
sudo postconf -e 'home_mailbox = Maildir/'Définition du domaine :
sudo postconf -e 'mydomain = nehemiebarkia.fr'Définition des certificats SSL :
sudo postconf -e 'smtpd_tls_cert_file = /etc/letsencrypt/live/nehemiebarkia.fr/fullchain.pem'
sudo postconf -e 'smtpd_tls_key_file = /etc/letsencrypt/live/nehemiebarkia.fr/privkey.pem'
Vous devez disposer du logiciel certbot pour avoir de tels certificats. Référez-vous à leurs documentation pour avoir des certificats !
Configuration de l'authentification SMTP :
sudo postconf -e 'smtpd_sasl_type = dovecot'
sudo postconf -e 'smtpd_sasl_path = private/auth'
sudo postconf -e 'smtpd_sasl_local_domain ='
sudo postconf -e 'smtpd_sasl_security_options = noanonymous'
sudo postconf -e 'broken_sasl_auth_clients = yes'
sudo postconf -e 'smtpd_sasl_auth_enable = yes'
sudo postconf -e 'smtpd_recipient_restrictions = permit_sasl_authenticated,permit_mynetworks,reject_unauth_destination'
Définition des aliases :
sudo postconf -e 'virtual_alias_domains = nehemiebarkia.fr'
sudo postconf -e 'virtual_alias_maps = hash:/etc/postfix/virtual'
Création du fichier d'aliases :
sudo nano /etc/postfix/virtualpostmaster@nehemiebarkia.fr root
root@nehemiebarkia.fr rootGénération de la base de donnée des aliases :
sudo postmap /etc/postfix/virtualRedémarrage de postfix :
sudo systemctl restart postfix
Configuration de dovecot
Configuration des boites mails :
sudo maildirmake.dovecot /etc/skel/Maildir
sudo maildirmake.dovecot /etc/skel/Maildir/.Drafts
sudo maildirmake.dovecot /etc/skel/Maildir/.Sent
sudo maildirmake.dovecot /etc/skel/Maildir/.Trash
sudo maildirmake.dovecot /etc/skel/Maildir/.Templates
Exemple de configuration d'une boite mail pour un utilisateur non root :
sudo cp -r /etc/skel/Maildir /home/$USER/
sudo chown -R $USER:$USER /home/$USER/Maildir
sudo chmod -R 700 /home/$USER/Maildir
sudo adduser $USER mail
Remplacez $USER avec l'utilisateur concerné !
Définition de la localisation des boites mail :
echo 'export MAIL=~/Maildir' | sudo tee -a /etc/bash.bashrc | sudo tee -a /etc/profile.d/mail.sh
Modification des fichiers de configuration :
sudo nano /etc/dovecot/conf.d/10-auth.confdisable_plaintext_auth = yes
...
auth_mechanisms = plain loginDéfinition de l'emplacement des boites mails :
sudo nano /etc/dovecot/conf.d/10-mail.confmail_location = maildir:~/MaildirActivation d'SSL
sudo nano /etc/dovecot/conf.d/10-master.confservice imap-login {
inet_listener imap {
port = 143
}
inet_listener imaps {
port = 993
ssl = yes
}
...
}
service pop3-login {
inet_listener pop3 {
port = 110
}
inet_listener pop3s {
port = 995
ssl = yes
}
...
}
...
service auth {
...
# Postfix smtp-auth
unix_listener /var/spool/postfix/private/auth {
mode = 0660
user = postfix
group = postfix
}
sudo nano /etc/dovecot/conf.d/10-ssl.conf# SSL/TLS support: yes, no, required. <doc/wiki/SSL.txt>
ssl = required
...
ssl_cert = </etc/letsencrypt/live/nehemiebarkia.fr/fullchain.pem
ssl_key = </etc/letsencrypt/live/nehemiebarkia.fr/privkey.pem
...
# SSL protocols to use
ssl_protocols = !SSLv3
ssl_min_protocol = !SSLv3Vérifier votre configuration dovecot :
dovecot -nRedémarrage de dovecot :
sudo systemctl restart dovecotFaire un clone avec mots de passe :
git clone https://utilisateur:motdepasse@gitlab.nehemiebarkia.fr/Utilisateur/projet.gitDésinstallation :
1 - Extinction des services :
gitlab-ctl stop2 - Désinstallation de Gitlab :
gitlab-ctl uninstall3 - Suppression du Package Gitlab :
apt-get purge gitlab-ce
apt-get remove gitlab-ce
4 - Suppression des fichiers :
rm /opt/gitlab/ /var/log/gitlab/ /var/opt/gitlab/ -r5 - Redémarrage :
rebootEt voila ! Gitlab s'en est allé !
No Comments